Removing Worn Bleed Screws
It is a shame to have to throw away a perfectly good radiator just because the bleed screw doesn't work anymore.
There are three main problems you will come up against:
- A screw where the square section has become rounded
- A screw that is seized up in the hole due to corrosion
- A thread that has been damaged or corroded
Or you might have all of them
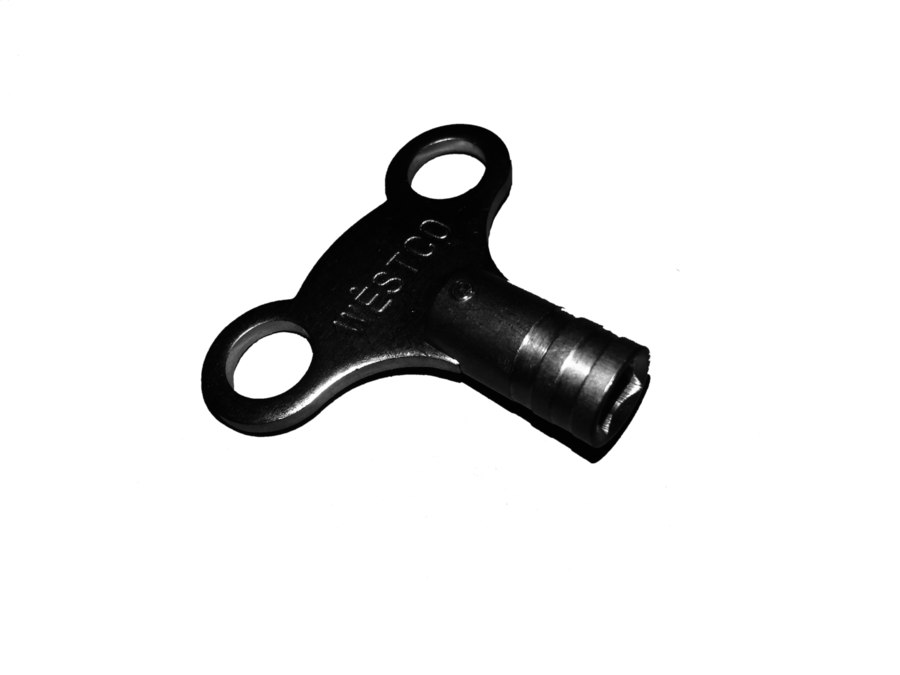
Standard Key
This is the standard radiator bleed key
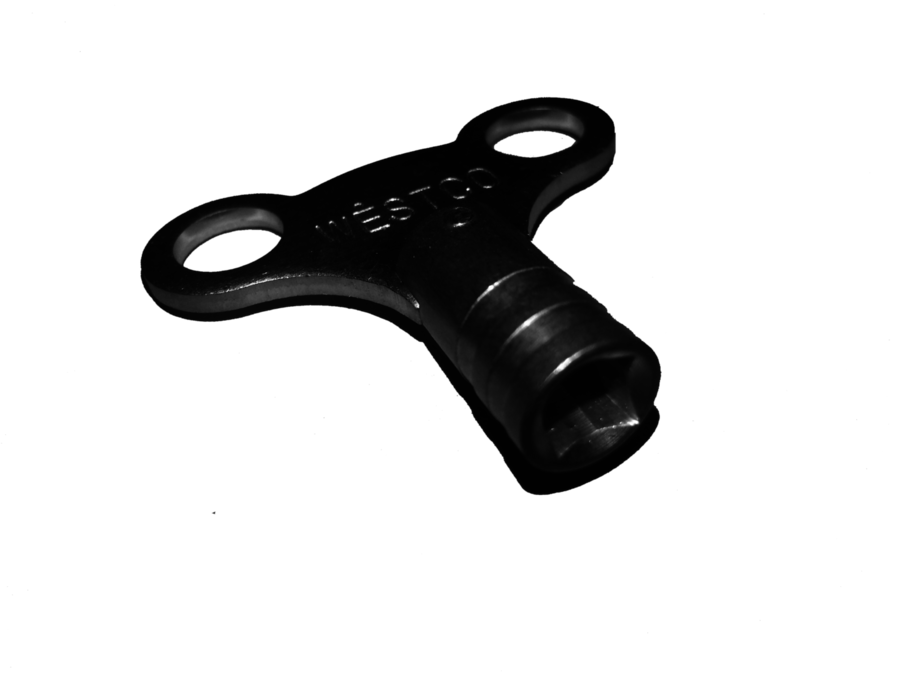
Unfiled Key
Notice the hole has tappered edges. So when inserting key it does get a good hold of the bleed screw
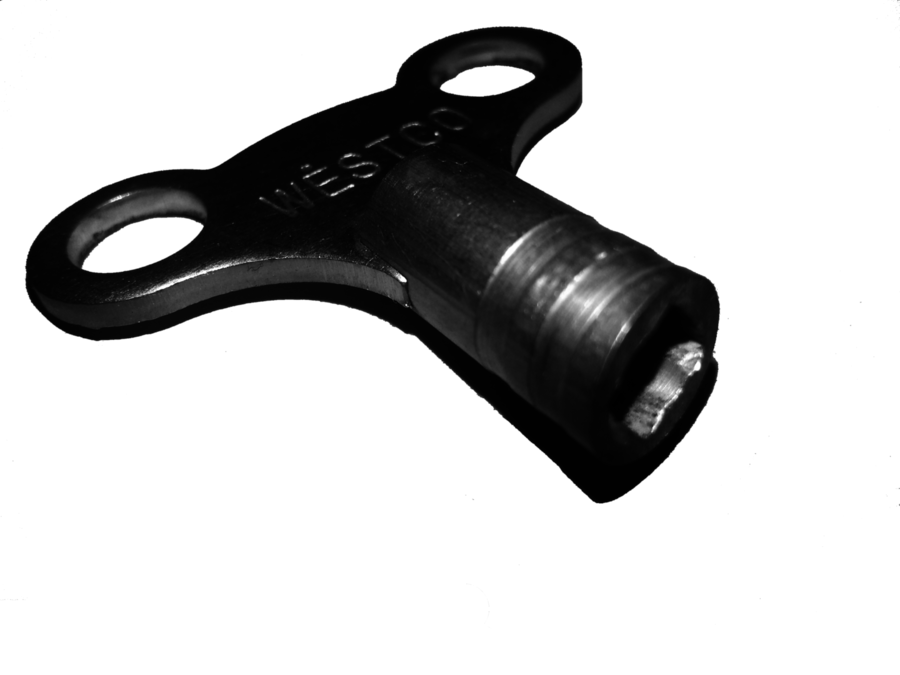
Filed Down
Here I have filed down the tappered edges. It now has more chance of turning the bleed screw then rounding off.
It is a good idea to spray the screw and the hole with an easing oil such as WD40 each day for a few days before starting. Scrape away any corrosion or paint from the screw before spraying. Tapping on the end with a hammer or heating with a blowlamp can help to release the screw.
Rounded off square section
Three possible approaches might work
1 If the rounding is slight a small c-spanner might grip it well enough. You might file the head flatter to allow the spanner to grip better.
2 For more serious rounding a Mole type grip might get enough hold though it can make the rounding worse. Don't try that more than a couple of times
3 On one screw I forced on a small hexagonal socket that was a very tight fit. I then had just enough grip to turn the screw.
4 Sometimes heating with a blowlamp can release screws as brass expands more than steel. I have not used this method.
Corrosion where the head is still square
Spend more time spraying and scraping. Use a brass box spanner type bleed key, not the grotty ones made of flat steel with square holes in them. If the screw is too tight to remove then use any of the approaches for rounded off sections.
Damaged thread
Steel corrodes. Some or all of the thread might have become rough or damaged but might still be usable. The usual method is to use a tap. You need one that doesn't taper, called a bottom or plug tap. The size is M6. It is best to use a cutting oil but ordinary oil is fine perhaps alternating with WD40. Just screw the tap in gently. Unscrew it, wipe off the muck and repeat. Take care to stop when you touch the bottom of the hole where the screw seals.
On a double radiator you can't get a tap into the hole on the front panel. Get an M6 screw, with a hex head, about 16 mm long. File or grind a flat on one side of the thread. The screw can then be used like a tap. Many of the screws used on cars are M6 if you don't have one in stock.
Sometimes the hole itself is blocked at the bottom. You know this because no water or gas escapes when the screw is out. Use a wooden cocktail stick to poke away any blockage. Take care to catch spills. If you have the radiator off the wall you can then flush it through using a hose until you see water squirting out of the bleed hole. Turn the radiator upside down before moving it. Try to avoid getting the black liquid on your clothes and carpet. Wash the muck immediately if you do spill it or it might stain.
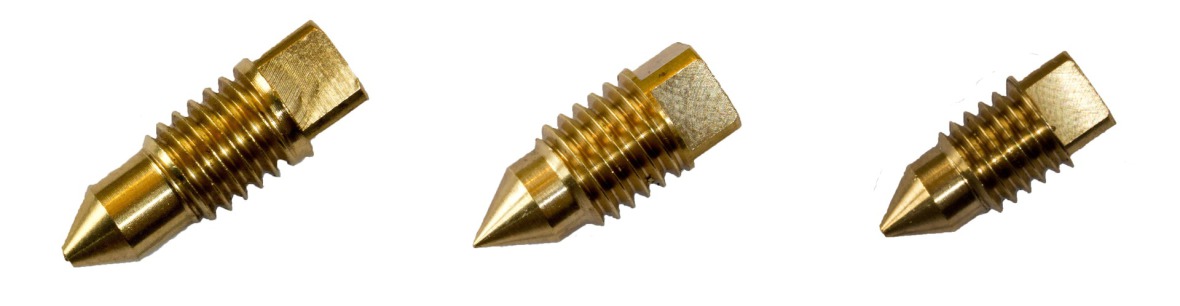
Using the new screw
Take care the first time you screw it in. If it is stiff you might need to clean the thread in the hole more. It might not seal well the first time you use it as the soft brass has to bed into the bottom of the hole. If it leaks turn off the valves at both ends of the radiator, remove the screw and screw it in again. It might take several goes. Don't force it or you will back to needing a new screw again. When bedded in you should only tighten it till it just bites. Then turn on one valve. If it doesn't leak turn on the other.